Tested with…
- IBM Thinkpad T61p
- Ubuntu Karmic AMD64 using bash
Environment Preparation
In this tutorial I’m assuming that you are using your own machine to develop the RTX. In order to do any RTX development
at home, you need a decent development environment, preferrably Linux, and the following tools:
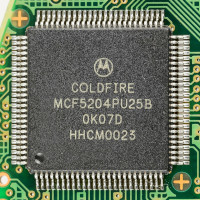
- Coldfire Emulator : This emulator is able to simulate the Coldfire
boards used in the lab.
- A GCC cross-compiler toolchain for the Coldfire target: The instruction set of your home box will likely differ from
the Coldfire target. As such, you need to get or build a compiler that executes on your home box and generates Coldfire
instructions. Since GCC does not do this job on its own, you also need to build/download the supportive tools for GCC.
Use GCC 3.4.X: I assume many of the readers will actually want to use the newest fancy GCC to build your project. I
suggest that you use a GNU compiler revision that has matured over the years and is compatible to what we use in the lab.
In addition some compiler parameters sneakily change from revision to revision, so do warning options and supported
features.
GCC 3.4.X needs to be patched to run on amd64: Many of you may have 64bit machines. There is a defect in the GCC 3.4.X
that is triggered when cross-compiling on amd64 targets. This bug needs to be patched by you (see below).
Building GCC
A GCC toolchain needs at least binutils to work. Since the RTX is to be written in C, we just need the “GCC part” of GCC.
Lets start by defining some locations where the compiler should go. It is good practice not to stuff the toolchain into
the regular system directories. I like to use /usr/local/coldfire as prefix for all tools. Lets start by setting
up the environment:
sudo mkdir -p /usr/local/coldfire/bin
sudo mkdir -p /usr/local/coldfire/lib
sudo mkdir -p /usr/local/coldfire/share

export INSTPREFIX=/usr/local/coldfire
export PATH=${INSTPREFIX}/bin:${PATH}
echo "export PATH=/usr/local/coldfire/bin:${PATH}" >> ~/.bashrc
echo "setenv PATH /usr/local/coldfire/bin:${PATH}" >> ~/.cshrc
Download and Install Binutils
Update, use Binutils 2.18 instead of 2.16.1. On more recent Linux distros, 2.16.1 produces invalid M68K opcodes. The
compiler flag “-Wno-format-security” is used to avoid halt on warnings, because more recent GCC versions became way more
picky than before.
mkdir -p ~/build_env
cd ~/build_env
wget -c http://ftp.gnu.org/gnu/binutils/binutils-2.18.tar.bz2
tar xvjf binutils-2.18.tar.bz2
cd binutils-2.18/
CFLAGS="-Wno-format-security" ./configure  --target=m68k-elf --prefix=${INSTPREFIX}
CFLAGS="-Wno-format-security" make
sudo make install
cd ..
Downloading, Bootstrapping and Building GCC
I prefer to have a tiny standard library for GCC. Newlib provides some basic functionality for embedded systems that can
be used for debugging purposes or to use convenience functions, such as sprintf. Please note, however, you are not
allowed to use any of these functions for your RTX project.
As described earlier, GCC needs to be fixed to work on amd64 targets. Rockbox provides this
patch for GCC 3.4.6 (see below).
Update: Some newer GCCs have trouble with compiling this old version of GCC. The main reason is that newer GCCs treat
warnings more seriously; therefore, an additional flag was added. Also for linking the files, the installation step
requires m68k-randlib. To include it in the PATH, the path is now issued as prefix to make install. Also with these
configuration flags, GCC will use its own newlib and does not depend on an external version anymore (extra steps removed).
wget -c "http://ftp.gnu.org/gnu/gcc/gcc-3.4.6/gcc-core-3.4.6.tar.bz2"
wget -c "http://www.rockbox.org/gcc/gcc-3.4.6-amd64.patch"

tar xvjf gcc-core-3.4.6.tar.bz2
cd gcc-3.4.6
patch -p1 < ../gcc-3.4.6-amd64.patch
mkdir build
cd build
CFLAGS="-Wno-unused-result" ../configure --target=m68k-elf --prefix=${INSTPREFIX} --enable-languages="c" --with-newlib
  --without-headers --disable-shared
CFLAGS="-Wno-unused-result" make
sudo PATH=${PATH}:${INSTPREFIX} make install
cd ..
cd ..
Provided there are no severe errors: Congrats! You have just build your very own GCC toolchain for the Coldfire target!
Installing and Using the Coldfire Simulator
Since you will not have access to the actual hardware at home, you need to simulate the board. There exists a
Coldfire simulator that is capable of emulating the board you are using for your project. Please note, however, this
emulator seems to not accurately simulate timer interrupts. As such, the simulated time may significantly differ from
the actual hardware.
wget -c http://www.slicer.ca/coldfire/files/coldfire-0.3.1.tar.gz
tar xvzf coldfire-0.3.1.tar.gz
cd coldfire-0.3.1
./configure --prefix=${INSTPREFIX}
make
sudo make install
cd ..
Now compile some sample S19 file. Figure the starting address out from the .map file (i.e. 0x100100000 for the
RTX project).
coldfire --board /usr/local/coldfire/share/coldfire/cjdesign-5307.board

DBUG> DL FILENAME.s19
DBUG> GO STARTADDRESS
On telnet ports 5206 and 5207 you can access the serial ports of the device.
Other References
The Coldfire CPU appears to be popular among Atari enthusiasts. A collection of tools and refefences is available on Vincent Riviere’s Atari page.
Cross-Posted on my former UWaterloo Website
Published: 2010-02-04
Updated : 2025-10-04
Not a spam bot? Want to leave comments or provide editorial guidance? Please click any
of the social links below and make an effort to connect. I promise I read all messages and
will respond at my choosing.