
The STM32F4Discovery evaluation board is allegedly build to
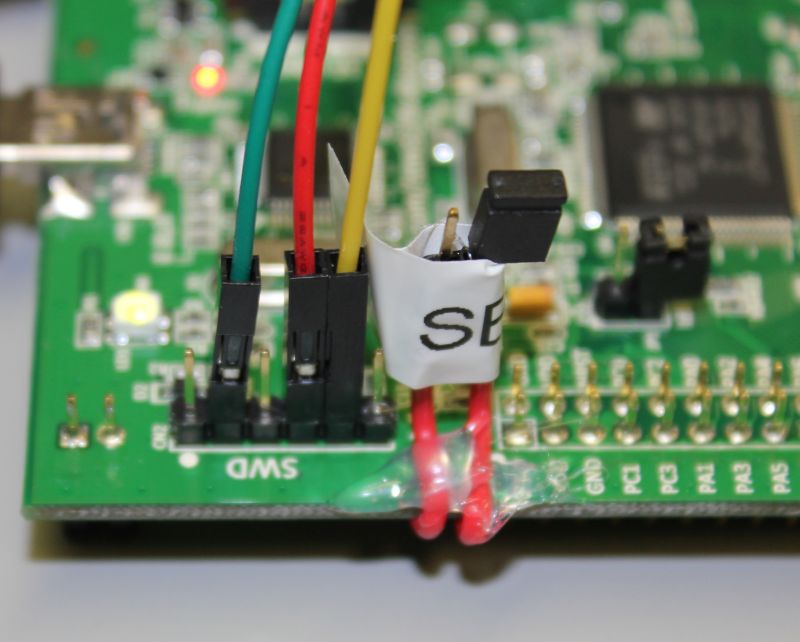
program remote targets. It features a header that that has a debug-out Serial Wire Debug (SWD) configuration. The
documentation and examples that exemplify this technique are sparse. The header features the following signals
(see UM1472 for
further info):
- Pin1 Voltage from target application (do not use),
- Pin2 SWD Clock: Connect to SWCLK of the target (PA14 on STM32s),
- Pin3 GND: Connect to GND of the target (needed to share the signal ground),
- Pin4 SWD I/O: Connect to SWDIO of the target (PA13 on STM32s),
- Pin5 NRST: Connect to the target reset pin (RST on STM32s),
- Pin6 SWO: SWD trace data line (optional and therefore not subject to this post).
If it would be that easy to just connect the signals then this tutorial could stop here. Unfortunately, to get things setup the board has to be modified further. The SWD data lines are obviously used by the STM32F407 that sits on the board. It is easy to have exclusive access to these lines as follows:
- Remove the jumpers on CN3.
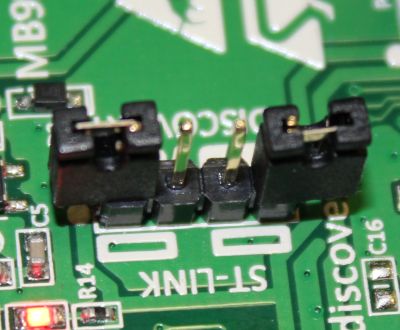
That way thedebugger portion of the discovery board will only share the SWD signals with the SWD connector.
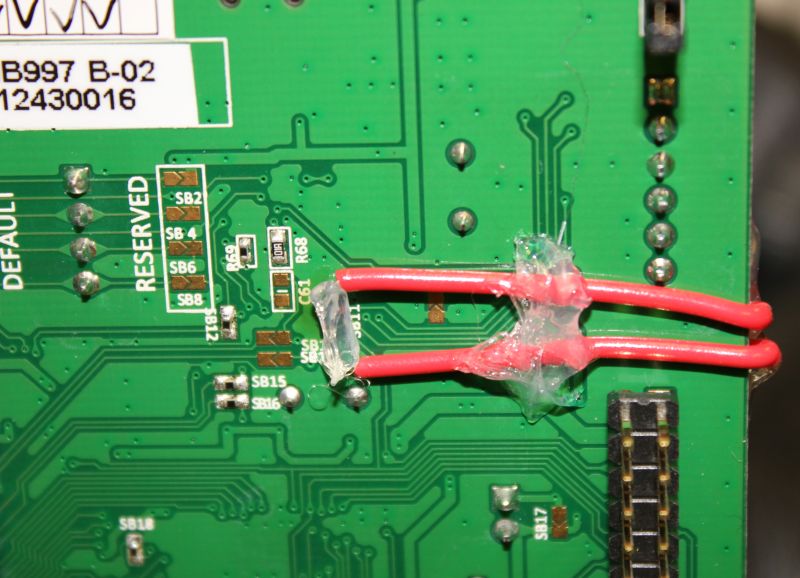
Furthermore, the debugger shares the reset line of the target with the on-board chip as well. If this line is not cut, the internal circuit of the on-board chip will prevent the signal to be properly used for remote applications. Instead of adding a jumper that would make it easy for people to fix this, the STM guys decided to add a solder bride.
- Replace the solder bridge SB11 with a jumper as shown in the following.
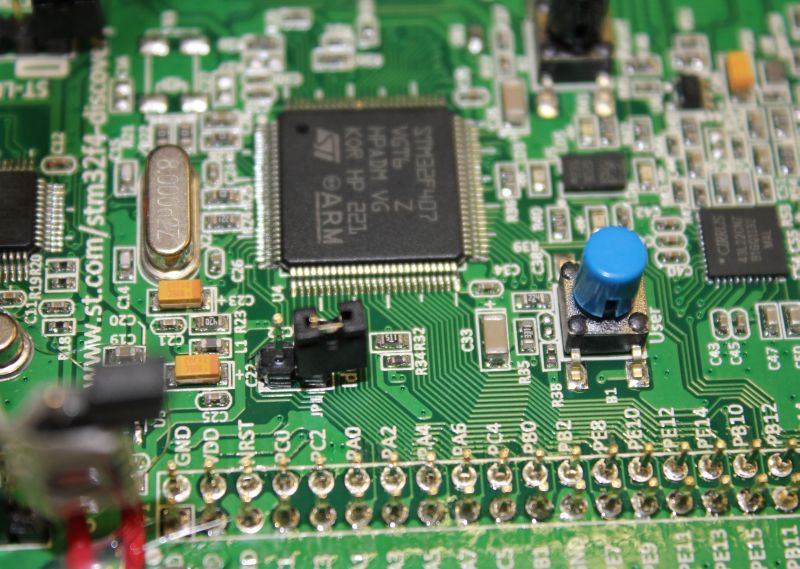
In order to be safe and avoid adverse affects, one can remove the power to the on-board chip. The STM people added a jumper that can be replaced with an ampere-meter to measure the power consumption of the chip.
- Remove JP1/PPI to cut the power to the on-board chip.
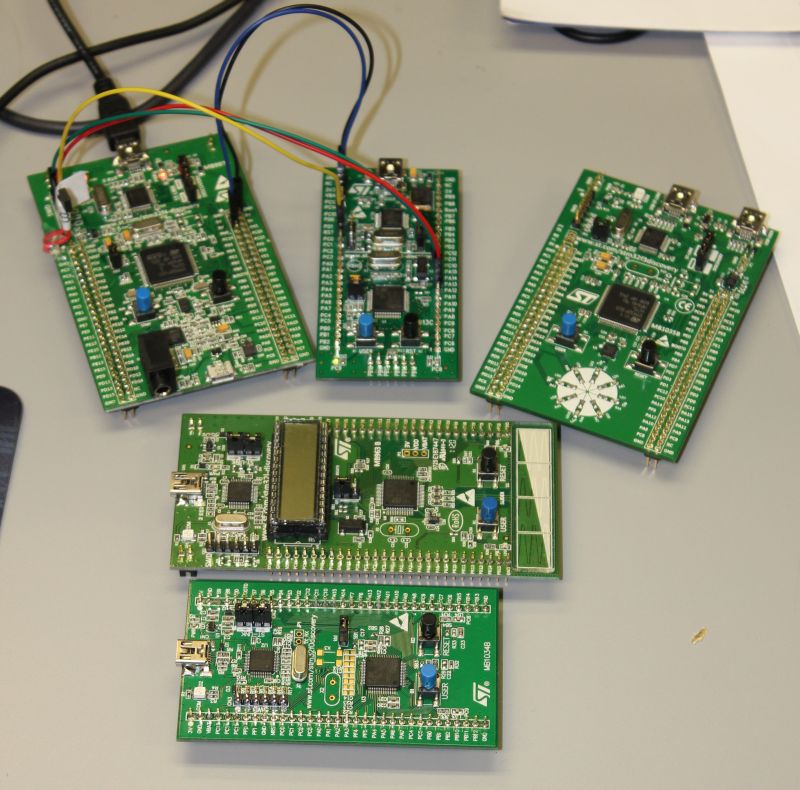
In order to be sure that I can program other chips of the STM32-family, I used a STM32VLDiscovery board as my guinea
pig. As seen in the picture, I shared the signal ground (GND) and provided 3V to the 3.3V pin of the target board from
the STM32F4Discovery. The reset line and SWD signals were connected as described above.

All people who have no real operating system (i.e., M$ Windows), can download and use the STLink utility from STM. It
provides crude access to the chip that is connected to the SWD port.
- Select “Target” -> “Connect…”
Watch the status line and confirm that the connected chip matches the outcome you expect. In my case I use the debugger to connect to a STM32VLDiscovery that has a STM32F100 chip.
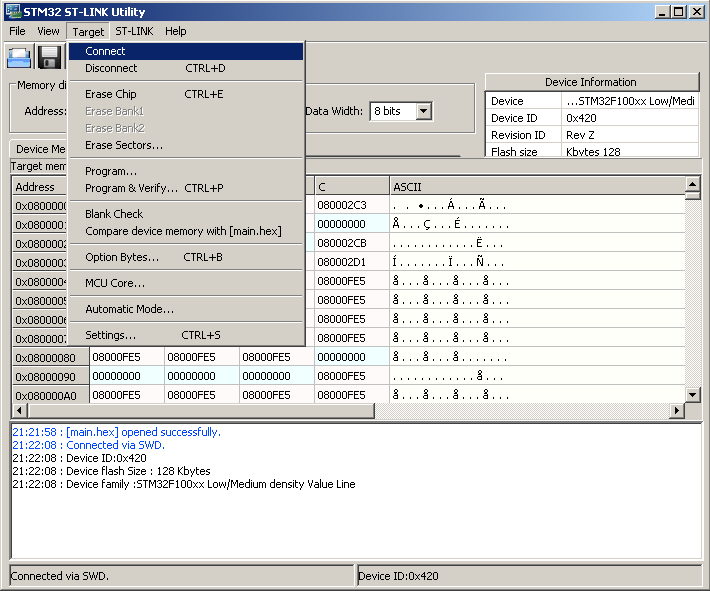
- Select “Target” -> “Program”
This allows you to upload an ELF or HEX file to the target board. The programming process should not take longer than a few milliseconds.
For all the advanced people there is OpenOCD for Linux. I am using a development version (v0.7.x) from their git repository. When you build OpenOCD from source (not covered in this article) make sure you enable the STLink support. Shown below is my example file to flash the ELF file into the STM32VLDiscovery.
OpenOCD can be invoked by just calling “openocd” in the directory where the ELF- and the configuration files reside.
source [find interface/stlink-v2.cfg]
source [find target/stm32f1x_stlink.cfg]
init
reset halt
flash write_image erase main.elf
reset run
shutdown
STM32F4Discovery in a debug-out configuration to debug an external target. To make it hard, I picked a different chip
from their value line series.
Although I am not a big fan of Windows, the STLink software seems to be a great way to upgrade the firmware of the
debugger itself. The reader should note that the STM engineers already use internal pull-ups for the debug circuit of
the STM. As a result it is possible to just connect the power supply, ground pins, PA13, and PA14 on a remote target on
most STM32 processors. Be sure to check out the “Getting started with XXX hardware development” application notes of
your STM32 target to confirm this.
Crossposted from my old blog
Published: 2013-01-27
Updated : 2025-10-04
Not a spam bot? Want to leave comments or provide editorial guidance? Please click any
of the social links below and make an effort to connect. I promise I read all messages and
will respond at my choosing.