Full printed-circuit files and firmware sources can be found here.
This is a write-up of a rebuild of a toy electric car that my son inherited broken about 2 years ago. I had this
sitting in a private repository for a while and when I had some guests come over they suggested posting it, to enable
other “engineering dads” to fix their kid’s cars too.
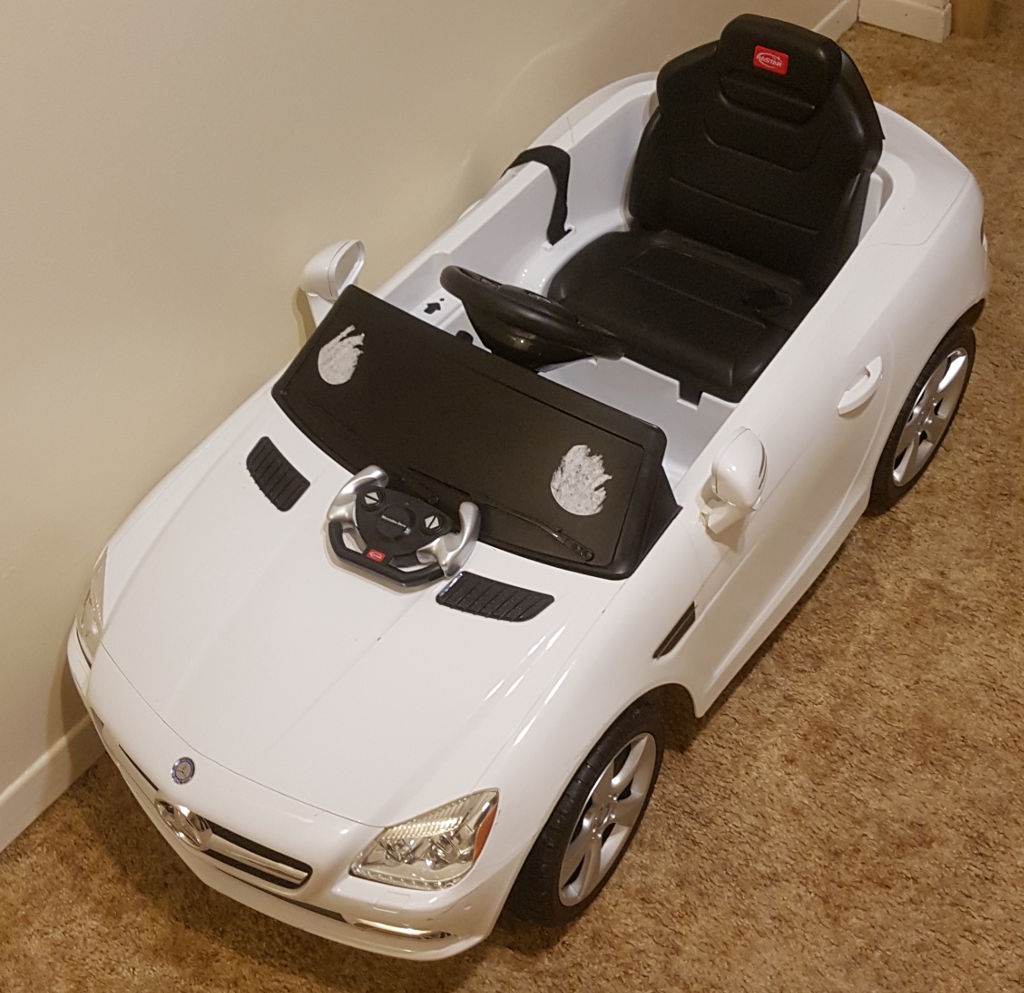
Two years ago, my son inherited this Mercedes SL coupe from perfect family friends. They brought this over from Japan
to Canada and their kids have been quite hard on it. We received it as a gift with a warning that it may need some work.
Upon close inspection, the steering system was quite worn out after a couple of test trips the motor controller also
gave up, to the point where we got stranded in the middle of nowhere. The kid really loves this car, so it turned into
a project. The objective was to rebuild the electronics on a dime and model the features as close as possible to the
original one.
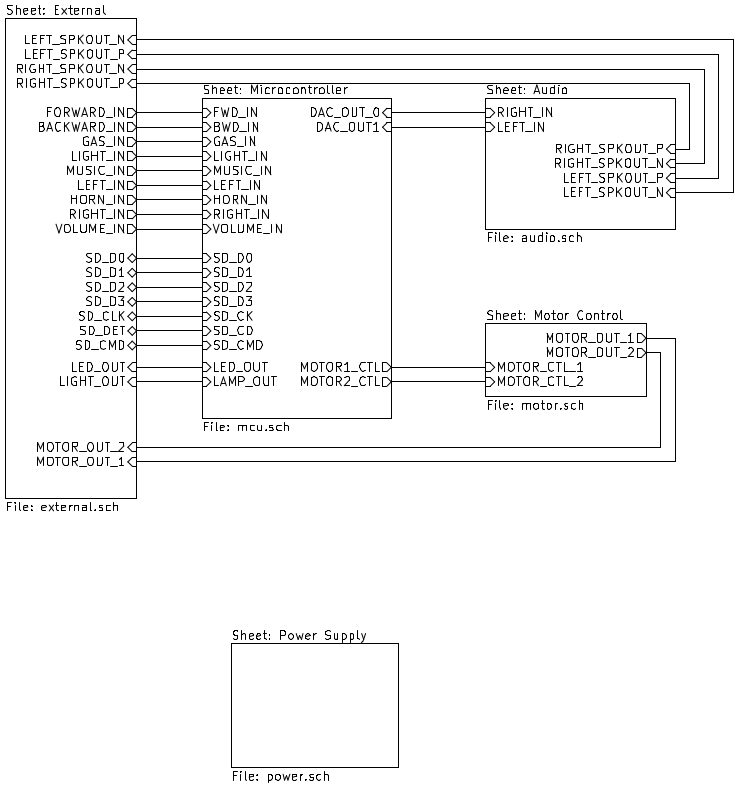
After some deliberation, I decided to rebuild the controller around an STM32F405RG microcontroller (MCU). The idea was
to have an MCU that would be powerful enough to do simple audio processing from some form of persistent memory (I picked
an SDCard in the end) and run some simple motor controls at the same time. Given that this was a single-unit build the
cost of the MCU would not be material. The DAC of the STM32F405 would feed a PAM8403 amplifier for speakers that were
mounted around the car. I wanted to do speed-based PWM motor controls but ended up in the end with a simple relay-based
H-Bride build from two SPDT relays that were driven by a simple Darlington driver. In addition, as a safety feature, the
toy car’s ignition also controls a relay that provides power to the entire circuit. All other buttons and switches,
including the directional control, drive other GPIOs on the controller. A block diagram of the PCB is shown below.
In terms of firmware, I quickly hashed a controller together from STM32CubeMX. It is not the most beautiful code. I was
quite busy with other projects at work, so initially pushing it to decode MP3s from the SDCard on the fly, got demoted
to a WAV file decoder that decodes 16KHz WAV mono files and starts playing them when various buttons on the car are
pressed. One major drawback of the current firmware is that the uSD card IO, the DAC interfacing, and button processing
happen in the same loop. This adds perceivable jitter to the audio output. I am happy to accept pull requests to fix
this for anyone who wants to build a 6V toy car controller. I had fun 2 years ago when I first powered the car up with
fresh electronics.
My son drives this car to this day.
Published: 2022-07-04
Updated : 2025-10-04
Not a spam bot? Want to leave comments or provide editorial guidance? Please click any
of the social links below and make an effort to connect. I promise I read all messages and
will respond at my choosing.